
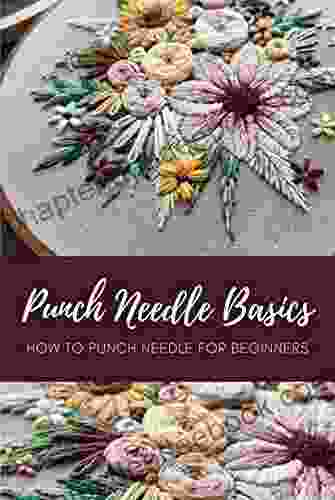
How to Punch Needle for Beginners: Embroidering with a Punch Tool

Welcome to the fascinating world of punch needling! This mesmerizing craft, which combines embroidery and rug-making techniques, allows you to create exquisite textiles, from wall hangings to pillows and carpets. As a beginner, embarking on this artistic journey may seem daunting, but with the right guidance and a little practice, you'll be able to master the art of punch needling in no time.
In this comprehensive guide, we will explore the fundamentals of punch needling, from selecting the right tools and materials to understanding basic stitches and executing various projects. Whether you're a complete novice or seeking to expand your artistic repertoire, this article will provide you with a thorough foundation for success.
4.5 out of 5
| Language | : | English |
| File size | : | 22929 KB |
| Text-to-Speech | : | Enabled |
| Enhanced typesetting | : | Enabled |
| Print length | : | 63 pages |
| Lending | : | Enabled |
| Screen Reader | : | Supported |
Essential Materials for Punch Needling
- Punch needle: This specialized tool comes in various sizes and shapes, each designed for different types of projects and fabrics. Beginners may opt for a medium-sized needle with a sharp point and a comfortable grip.
- Fabric: Choose a fabric that is sturdy enough to withstand the punching motion yet pliable enough to allow the needle to pass through easily. Monks cloth, linen, and burlap are popular choices.
- Yarn: Experiment with different yarn weights and textures to create varying effects. Wool, cotton, and acrylic yarns are commonly used.
- Embroidery hoop: This essential tool holds the fabric taut while you punch, allowing for greater control and precision.
- Scissors: Keep a pair of sharp scissors nearby for trimming yarn and shaping your creations.
- Needle threader (optional): This tool can help you thread yarn through the needle more easily, especially if you're using a small-eyed needle.
Basic Punch Needle Stitches
The secret to creating beautiful punch needle projects lies in mastering the basic stitches:
- Half stitch: This stitch, also known as the upright stitch, creates a raised surface with a dense, looped texture. To execute a half stitch, insert the needle into the fabric and pull the yarn through, forming a loop. Anchor the loop by reinserting the needle close to where you brought it out, leaving a short length of yarn on top.
- Full stitch: This stitch results in a tighter, more compact texture. Insert the needle into the fabric and pull the yarn through, creating a loop. Instead of anchoring the loop immediately, pull the needle through the fabric again, just above the base of the loop. This will create a second loop, which you then anchor by reinserting the needle close to where you brought it out.
- Reverse stitch: This versatile stitch can be used to create outlines, fill in areas, and add texture. To execute a reverse stitch, insert the needle into the fabric and pull the yarn through, leaving a short tail. Bring the needle back up through the fabric a short distance away, creating a second loop. Pull the yarn through the second loop, anchoring it to the fabric.
Exploring Punch Needle Techniques
Once you've mastered the basic stitches, you can explore a myriad of techniques to create intricate and eye-catching designs:
- Shading: Create depth and dimension by varying the yarn colors and stitch density. Gradually switch from light to dark shades or use multiple yarn strands to achieve subtle gradients.
- Texturing: Experiment with different stitch lengths and directions to add texture to your designs. Combine half stitches, full stitches, and reverse stitches to create unique patterns and surfaces.
- Layering: Punch needle designs can be layered upon each other to create complex and multidimensional artworks. Use different colors and stitches to build up layers, adding depth and interest to your creations.
- Embellishments: Enhance your punch needle projects with beads, sequins, or fabric scraps. Sew on embellishments or punch them directly into the fabric for a touch of sparkle and texture.
Fun and Rewarding Punch Needle Projects for Beginners
Ready to put your newfound skills into practice? Here are a few beginner-friendly projects to get you started:
- Punch needle coaster: Embroider a simple design onto a piece of fabric and finish the edges with a blanket stitch or fabric glue. Use a sturdy fabric like burlap or canvas for durability.
- Punch needle wall art: Create a small punch needle design and frame it in an embroidery hoop. Hang it on the wall as a unique and eye-catching piece of art.
- Punch needle pillowcase: Decorate a plain pillowcase with a punch needle design. Use a light-colored fabric to showcase your stitches and create a cozy and stylish accent.
- Punch needle rug: Embroider a larger design onto a piece of burlap or canvas. Finish the edges with a fabric binding or glue and use it as a unique rug or wall hanging.
Essential Tips for Punch Needle Success
- Practice makes perfect: The key to success in punch needling is practice. Experiment with different stitches and techniques to develop your skills and find your own artistic style.
- Use a sharp needle: A dull needle will struggle to penetrate the fabric and can damage your yarn. Keep your needle sharp by occasionally using a needle sharpener.
- Pull the yarn evenly: To achieve a consistent stitch density, pull the yarn evenly through the fabric. Avoid pulling too tightly or too loosely.
- Don't overcrowd your stitches: While it may be tempting to fill in areas densely, avoid overcrowding your stitches. Too many stitches in one spot can create a bulky and uneven surface.
- Be patient: Punch needling can be a time-consuming craft, so don't get discouraged. Take your time, enjoy the process, and let your creativity flow.
Embarking on the journey of punch needling is an exciting and rewarding endeavor. With the right tools, materials, and techniques, you can create stunning textiles that will beautify your home and bring joy to your life. Remember to embrace the creative process, experiment with different stitches and textures, and let your imagination soar. Happy punching!
4.5 out of 5
| Language | : | English |
| File size | : | 22929 KB |
| Text-to-Speech | : | Enabled |
| Enhanced typesetting | : | Enabled |
| Print length | : | 63 pages |
| Lending | : | Enabled |
| Screen Reader | : | Supported |
Do you want to contribute by writing guest posts on this blog?
Please contact us and send us a resume of previous articles that you have written.
 Novel
Novel Page
Page Chapter
 Text
Text Reader
 Library
 Paperback
 Magazine
 Paragraph
 Sentence
 Foreword
 Preface
 Synopsis
 Annotation
 Scroll
 Bestseller
 Library card
 Narrative
 Autobiography
 Memoir
 Reference
 Thesaurus
 Narrator
 Character
 Resolution
 Librarian
 Catalog
 Borrowing
 Stacks
 Scholarly
 Lending
 Academic
 Journals
 Reading Room
 Rare Books
 Interlibrary
 Study Group
 Awards
 Reading List
 Theory
 Ruth Lane
 Nancy J Altman
 Christa Watson
 Mark Helprin
 Shifio Patterns
 Eisaiah Engel
 Mike Smith
 Ivo H Daalder
 Emma Ashwood
 Mari Sandoz
 John A Van De Walle
 Sarah Whelan
 Philip Roth
 Douglas Smith
 Dominique Moyse Steinberg
 D Marie
 Charles Streams
 Tracy Bryan
 Ted Reed
 George Yool
Light bulbAdvertise smarter! Our strategic ad space ensures maximum exposure. Reserve your spot today!

 Pablo NerudaJoan Llensa: The Inspiring Story of the Corn Girl Who Became a World-Renowned...


 Alec HayesDecoding the Intricacies of Global Consumer Behavior: A Discourse with Zetta...
 Art MitchellFollow ·3.7k
 Aron CoxFollow ·8.1k
 Thomas PowellFollow ·8.5k
 William WordsworthFollow ·9.4k
 Richard SimmonsFollow ·19.5k
 Adrian WardFollow ·18.8k
 Emilio CoxFollow ·6.6k
 Branson CarterFollow ·6.7k
 F. Scott Fitzgerald
Robot Buddies: Search For Snowbot
In the realm of...

 Billy Foster
 Mario Vargas Llosa
Unlocking Academic Success: A Comprehensive Guide to...
In the ever-challenging academic...


 Patrick Rothfuss
 Gabriel Blair
Make $000 Per Month Selling Your YouTube Freelancing...
Are you looking for a...
4.5 out of 5
| Language | : | English |
| File size | : | 22929 KB |
| Text-to-Speech | : | Enabled |
| Enhanced typesetting | : | Enabled |
| Print length | : | 63 pages |
| Lending | : | Enabled |
| Screen Reader | : | Supported |
